You noticed that you have some soft spots or obvious rot in one or more of your logs. Now what? Rotten logs are a problem Edmunds & Company deals with everyday. Rot is easy to identify but it is usually harder it find the underlying cause and make changes that will ensure the rot does not occur again. With over 40 years of experience replacing rotten logs, we are ready to take care of this problem.
THE PROBLEM
Finding rot in your logs is discouraging and confusing. What is the best way to fix the problem? There are all sorts of products available for do-it-yourself fixes but they don’t address the underlying problem – what is causing the log to ROT.
Replacing rotten posts can be tricky business.Water is the enemy of log homes. When water soaks into the logs, rot can take hold.When a log has rot more than 50% through the log, it usually requires a whole log replacement.Most often, the repair is accomplished with a half-log replacement, also called re-facing.
Edmunds & Company has been doing this type of work since 1978 and in our experience, we have found that the best way to fix rotten logs is to remove the rot, install a new log and address the underlying causes.
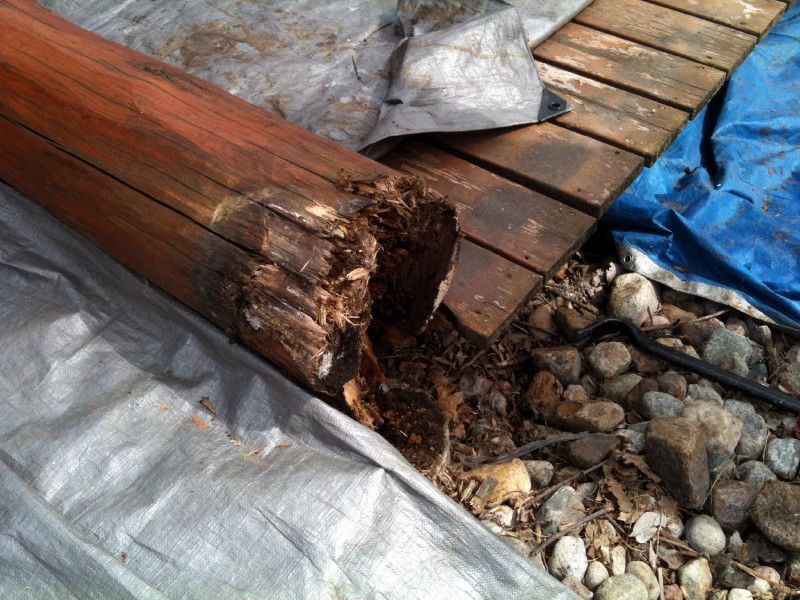
First the rot must be cut out and the fresh wood treated with a borate solution.
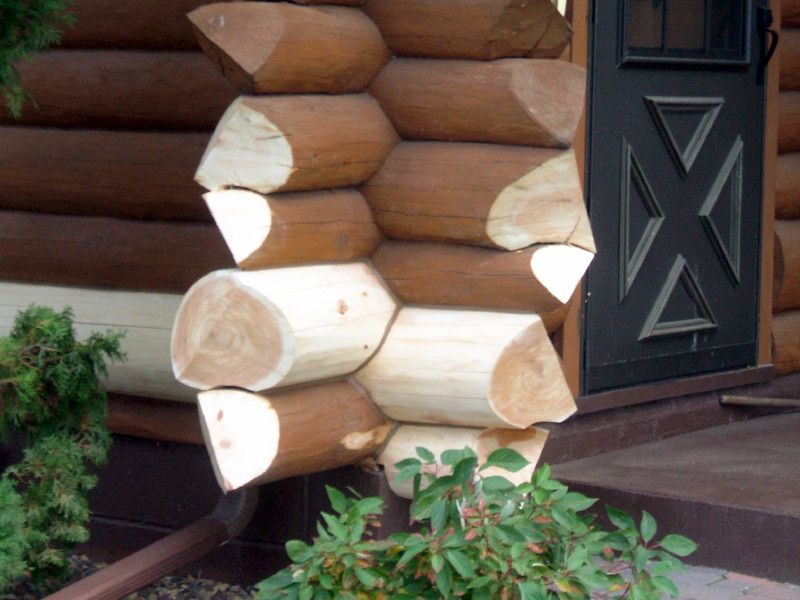
This corner has been completely restored with kiln-dried cedar logs and is ready for stain.
When rot reaches more than 50% of the log, typically it is necessary to replace the whole log. In the photo to the left, the entire stack of crowns had to be replaced. This entailed cutting out the rot and then scribing the replacement logs so they neatly fit on top of each other. Finally, we applied chink carefully between the logs making sure there were no gaps between the logs where moisture could get in and begin the rot process again.
Why do log homes develop dry rot?
In a word – WATER. Moisture in the form of rain or snow is the reason for rot in wood. If your logs have rot – it is caused by water. The way to stop rot is to control the logs’ exposure to water. This is a simple concept but not that simple to actually do!
This short video tells the story about why water splashing off a deck onto logs is the leading cause for rot in this area.
The rot organism needs these ingredients to begin degrading wood:
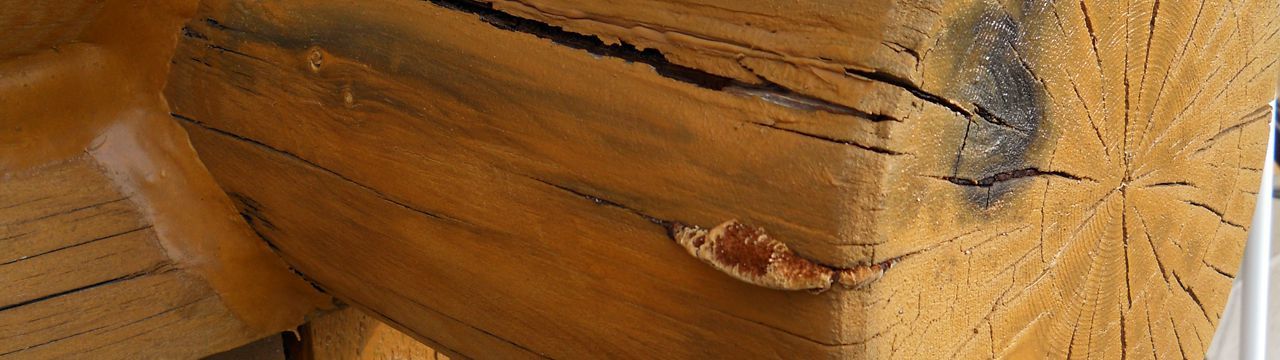
So many cracks, so much water infiltration- so much rot.
Moisture content between 20% and 30% in the wood’s fiber. While this percentage varies from species to species, most wood will start to deteriorate at around 20% moisture.
Temperatures between 60º and 90º. This is why most of the active rotting occurs during our hot, humid Midwestern summers.
Oxygen – rot needs it to get going. This is why wood that is underwater does not rot. There is not enough “free oxygen” for the process to take place.
A food source. In the case of log homes, this means wood, i.e. YOUR HOUSE!
The work Matt and his crew did on my house was amazing to say the least- the only people I will use for all my log cabin needs!
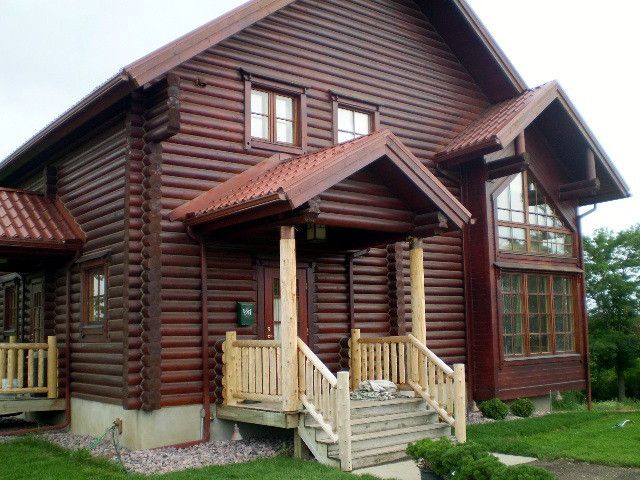
Have adequate overhangs wherever possible. The best way to stop water from getting into the logs is to keep it from falling on the logs in the first place. We recommend at least a 24” overhang on a single story log home and more is almost invariably better. On some lakeside gable walls, for instance, we recommend five to eight feet of overhang. These overhang numbers are the two most important aspects to consider when buying a log home. Are there adequate overhangs?
Have gutters in place and keep them working. Gutters often have to be retrofitted to an existing log home in order to keep the water that splashes off the roof to a minimum. The number one cause for having to replace rotten logs is splashing water from the roof onto lower logs. Gutters can be a reasonably economical part of the solution to controlling moisture.
Free board – in other words – keep the house up off the ground. Many times, this is a difficult thing to change because it can involve lifting the house and putting it on a new foundation. However, if you are in the design stage of building a log home, it is a relatively simple thing to raise the building above the surrounding ground (above grade) to prevent the water coming off the roof from splashing on to the lower logs. It will also help by preventing scrubs, tree roots, and simple soil moisture from making its way into the lower logs.
Protect the lower logs around your decks. Water splashing onto lower logs is the #1 cause for log rot. Decks have two ways they put the logs at risk.
They reflect UV light and heat from the sun onto the logs, which in turn, causes finishes to breakdown faster.
They deflect water (splash) onto the logs effectively negating the “freeboard”. If you would like to know how to properly flash a frame deck to a log wall, check out this drawing. File download: How to Flash a Frame Deck to a Log Wall PDF If you are in the design stage, we recommend having a limited amount of deck around a log home. Think about what deck space you are going to actually use and build that. For the decks that you do build or already have, make sure they are properly flashed between the logs and the deck itself. Keep in mind that ,while the logs elsewhere on the home are going to be re-stained every 2-6 years, the logs behind the deck are never going to get another coat unless the deck is removed. The area where the deck comes in contact with the logs must be completely sealed or it will rot.
Keep objects away from the logs to avoid water splashing back on them. Keep accessories, utilities, propane/oil tanks, woodpiles and other items away from your log home. While at first glance the convenience of placing these items under the cover of the eaves of the house may seem like a good idea, it is not good for the logs. One reason is that the object may protrude out into the drip line causing water to splash back – wetting the logs. Secondly, when the rain stops, these areas aren’t allowed to dry out quickly because of being blocked from the free flow of air around the logs. Logs that are constantly wet puts stress on whatever type of finish is on the logs and can cause this finish to breakdown faster. Try your best to keep these items away from your logs in order to keep the logs dry.
Pay particular attention to windowsills. Pay particular attention to the logs underneath windows when you are trying to protect your logs from rot. Windows tend to concentrate water on the logs directly below them so it is very important to keep a close eye on these areas. Make sure the seal between the bottom of the window and the top of the log is tight. If there is a sill formed on the top of this lower log, make sure that it pitches water away from the window. Also make sure that any up-facing checks over 3/16″ are filled with caulking.
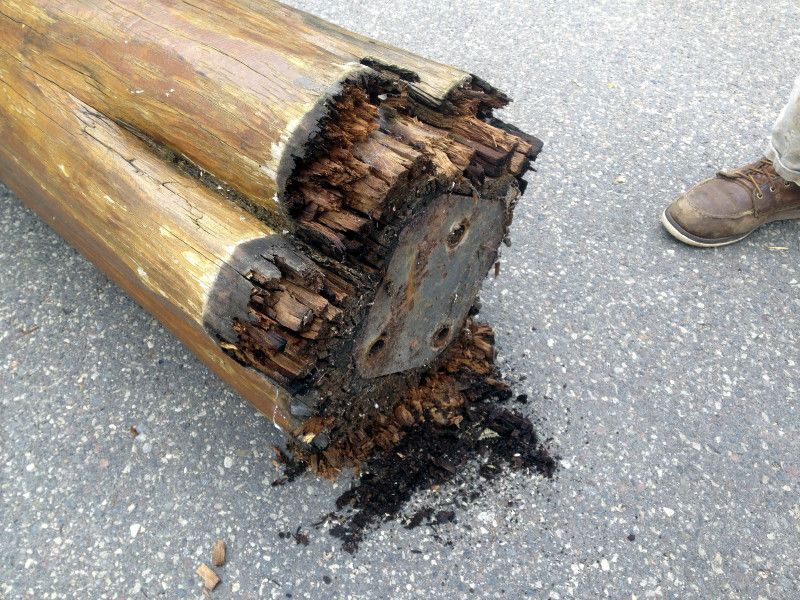
Posts are particularly susceptible to decay on the bottom and can be an ongoing issue on log homes with vertical log supports. Problems start when posts are not protected from soaking up moisture from their base.
Edmunds & Company has replaced all types of log posts all over the Midwest. We can confidently replace yours.
Most often, a rotten post will need to be replaced in its entirety. It takes experience, skill, and the right equipment to replace the bigger, more difficult posts.
How to solve decay at the bottom of log posts?
If you have rotten posts, you want them fixed right, the first time! The problem with posts rotting from the bottom up can be avoided if proper attention is paid to how log posts are installed.
This large post was surrounded by limestone and mortar. These materials hold moisture up against the wood and inevitably, rot happens.
When log posts are allowed to sit directly on concrete – they will rot.
This post sat below ground level.
The steps to replace a rotten log post:
This new cedar posts sits off the ground on a metal stand to break the connection between ground moisture and the log base.
Use a temporary post to support the structure above the rotting post to prevent shifting or sagging
Remove the old post
Make sure the footing is adequate to support the new post. If it isn’t, raise the level of the footing by extending it or replacing it
Install new post with stand-off base installed on bottom of post <
Remove the temporary post
CAULK CRACKING OR PEELING FROM LOGS?
Keeping a log home sealed is important. The joints between logs need to be sealed in order to prevent air leaks but moreover – they need sealing because of moisture.
The Problem: Failed Caulking
Caulking that is cracking or pulling away from the logs will let air and/or moisture into the logs, which can lead to rot.
Larger checks in logs can let moisture into the core of the log where it can’t dry out very easily. Overexposure to moisture leads to rot.
If caulking is pulling away, water can make its way into the home around windows and doors.
Caulking fails for a number of reasons including:
It was of poor quality and the material simply failed. This is not the place for skimping on cost. Use quality log home caulking.
It was applied on a surface that was not prepared correctly e.g. there was loose finish or dirt on the log surface.
The logs are compromised in some way due to rot or the foundation is failing and causing undue stress to the log wall.
What can be done about failed caulking?
Keeping logs sealed will prevent infiltration of water and keep the logs “healthy”.
Re-caulking or re-chinking is the solution here. Prepping the logs prior to application is important and this includes removing loose debris from the logs, making sure a quality log home finish is applied and installing a foam backer into the joints. Once the prep work is done, new caulking or chinking is applied using a bulk loading caulking gun and smoothed out carefully to create a consistent seal between the caulking material and the logs.